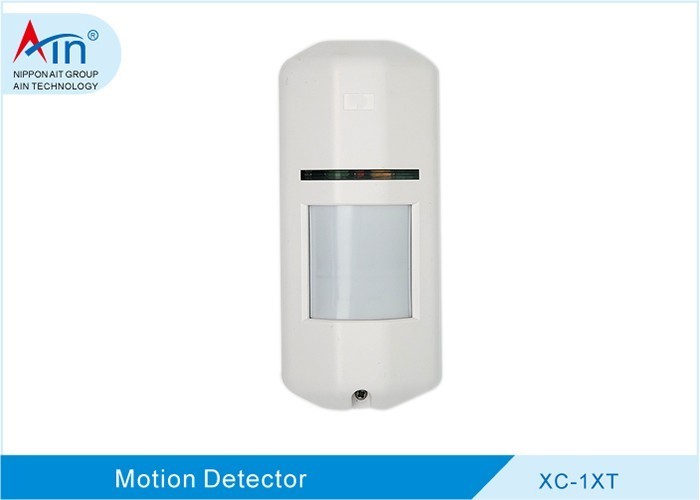
Installing an outdoor intrusion detector requires careful planning and a methodical approach. The XC-1XT is an outdoor wall-mount wide-angle dual-technology intrusion detector that combines passive infrared (PIR) and microwave detection to verify alarms. This guide provides a step-by-step process for installing the XC-1XT outdoor dual technology intrusion detector, covering site selection, mounting, wiring, configuration, and testing. The goal is to ensure the device is set up to perform its intended function reliably within a security system.
Before You Begin: Understanding the XC-1XT and Installation Requirements
What the XC-1XT Is and How It Works
The XC-1XT is an outdoor wall-mount wide-angle microwave and passive infrared dual-tech intrusion detector. It works by requiring both the PIR sensor and the microwave sensor to trigger simultaneously before an alarm is generated. This dual-technology approach is designed to reduce false alarms compared to single-technology detectors. According to the manufacturer's product information, the XC-1XT includes features such as pet immunity, selectable pulse counting (2/4), selectable single-infrared detection, and IP65 ingress protection, which indicates a level of protection against dust and water jets.
Tools and Materials Needed for Installation
Before starting, gather the necessary tools and materials. A typical installation requires a screwdriver, a drill with appropriate bits, a wire stripper, a multimeter for verifying electrical connections, a ladder, and mounting screws and anchors suitable for the mounting surface. It is also advisable to use safety gear, such as gloves and safety glasses. The XC-1XT is designed for outdoor wall mounting, so the chosen surface must be stable and capable of supporting the detector securely.
Step-by-Step Installation Process
Step 1: Choose the Mounting Location
The mounting location is critical for the detector's performance. A common guideline is to mount the detector at a height of approximately 2.0 to 2.5 meters above ground level. The location should avoid direct sunlight, heat sources, and areas with moving objects such as tree branches or flags that could cause false alarms. The detection area should cover the intended zone that requires monitoring. While the XC-1XT offers wide-angle coverage, the exact detection range is determined by the specific model configuration and the environment.
Step 2: Mount the Detector Bracket
Once the location is selected, mark the positions for the screw holes on the wall. Drill pilot holes at the marked points, and then secure the mounting bracket to the wall using appropriate screws and anchors. Ensure the bracket is level and firmly attached to prevent movement or vibration. If using an optional accessory like the Detector 86 Box Mounting Bracket, it is designed as a standard 86 box cover plate and is compatible with standard 86-box installations for wall-mounted or ceiling-mounted setups.
Step 3: Wire the Detector
Wiring is a critical step that must be performed with care. Typically, the detector is connected to a power source (e.g., 12VDC) and an alarm output (NC/NO) that links to the control panel. Use a multimeter to verify the voltage at the power source and to check continuity in the alarm circuit before connecting. All outdoor connections must be weatherproof to prevent corrosion and short circuits. It is essential to follow local electrical codes and standards during this process.
Step 4: Adjust the Detector Head
After mounting and wiring, the detector head should be adjusted to aim at the protected area. Many outdoor detectors allow for horizontal and vertical adjustment. For instance, some models in the manufacturer's product line offer 180° horizontal and 10° vertical adjustment. While this specific range may not apply to the XC-1XT, proper alignment is universally critical for detection performance. The head should be positioned so that the detection zone covers the intended area without being obstructed.
Configuring the XC-1XT Settings
Setting Pulse Counting and Single-Infrared Mode
The XC-1XT includes selectable pulse counting (2/4) and a selectable single-infrared detection function, as per the manufacturer's product description. Pulse counting refers to the number of PIR pulses required to trigger an alarm. Selecting a higher pulse count (e.g., 4) can help reduce false alarms caused by small animals or environmental disturbances. The single-infrared detection mode allows the detector to operate using only the PIR sensor, which may be useful in certain conditions. These settings are typically adjusted via jumpers or DIP switches on the device. Refer to the product manual for specific switch locations and configurations.
Understanding Pet Immunity and Its Limitations
The XC-1XT is described as having pet immunity. This feature is designed to reduce false triggers from pets up to a certain weight and size. However, pet immunity is not absolute. The effectiveness of this feature depends heavily on proper mounting height and angle. If the detector is mounted too low or angled incorrectly, a large pet could still trigger an alarm. Therefore, following the recommended mounting guidelines is essential for the pet immunity feature to function as intended.
Testing and Finalizing the Installation
Performing a Walk Test
After installation and configuration, a walk test should be performed to verify that the detector triggers an alarm when someone enters the detection zone. Walk through the area at a normal pace and observe whether the detector's alarm output is activated. If the detector does not respond correctly, adjustments to the sensitivity or the detector head angle may be necessary. Repeat the walk test until the detector consistently responds to movement within the intended zone.
Checking Tamper and Environmental Protection
The XC-1XT is rated with IP65 ingress protection, which means it is protected against dust and low-pressure water jets from any direction. This makes it suitable for outdoor installation. Additionally, the detector is equipped with a tamper switch. Verify that the tamper switch is activated when the detector cover is opened. This ensures that any attempt to open the device will trigger an alarm signal to the control panel, enhancing the overall security of the system.
Maintenance and Troubleshooting Tips
Routine Maintenance
Regular maintenance helps ensure long-term reliability. Periodically clean the detector's lens with a soft, dry cloth to remove dust and dirt. Check the area around the detector for obstructions such as leaves, cobwebs, or overgrown vegetation that could block the detection zone. Inspect wiring connections for signs of corrosion or damage, especially after severe weather.
Common Issues and Solutions
Several common issues may arise with outdoor detectors. If false alarms occur, check for heat sources, moving objects, or reflective surfaces within the detection zone. If the detector does not alarm at all, verify the power supply, wiring connections, and sensitivity settings. A shorter-than-expected detection range may indicate that the detector is mounted too high or too low, or that the head angle needs adjustment. Addressing these factors typically resolves most operational issues.
Manufacturer Information and Support References
For reference, the XC-1XT is a product associated with AIN HOLDINGS SHENZHEN LTD. According to publicly available information, the company is headquartered in Bao'an, Shenzhen, China, and is involved in the development and manufacture of burglar alarm devices and security products distributed worldwide. The company has obtained international quality system certifications including ISO9001:2008, ISO14001:2004, and QC080000:2012, as well as product certifications such as CCC, CQC, UL, CE, and FCC.
For further information, the official contact details for AIN HOLDINGS SHENZHEN LTD. are as follows: phone +86-0755-23003181, email sales02@ain-cn.com. The company's official company profile page is available at http://www.ain-cn.com/gsjj.html, and the contact page can be found at http://www.ain-cn.com/contactus.html. These resources provide verifiable information regarding the manufacturer and its product lines.